Rhodes Frozen Bread Dough: A Comprehensive Baking Guide
Rhodes frozen dough offers convenience and consistent results for bakers of all levels. This guide details thawing, rising, baking, and troubleshooting,
ensuring delightful homemade baked goods every time. From rolls to artisan breads, unlock the potential of Rhodes dough!
Understanding Rhodes Frozen Dough
Rhodes frozen dough is a versatile, yeast-leavened product designed for home baking convenience. Unlike some frozen doughs, Rhodes contains no preservatives, relying on the cold temperature to maintain freshness and inhibit yeast activity. This means proper thawing and handling are crucial for successful results. The dough is formulated to deliver a soft, tender texture, similar to freshly made dough, after baking.
Understanding that Rhodes dough requires a two-rise system is key. The first rise allows the yeast to reactivate and develop flavor, while the second rise, after shaping, ensures a light and airy final product. Consistent temperatures during both rises are vital. Remember, Rhodes dough isn’t just about convenience; it’s about achieving bakery-quality results in your own kitchen!
Types of Rhodes Frozen Dough Available
Rhodes offers a diverse range of frozen dough options to suit various baking needs. Their classic Bake-N-Serv line includes dinner rolls, available in various sizes, and versatile loaf options like French rolls and artisan rolls. Sweet dough varieties, perfect for cinnamon rolls and other pastries, are also readily available.
Beyond the core offerings, Rhodes frequently introduces seasonal and specialty doughs, such as cinnamon knots and holiday-themed shapes. These pre-shaped options simplify baking even further. Whether you’re craving a simple side with dinner or an elaborate dessert, Rhodes provides a frozen dough solution. Exploring their product line unlocks a world of baking possibilities!
Thawing Rhodes Dough: The Essential First Step
Thawing Rhodes frozen dough correctly is crucial for successful baking. Never thaw at room temperature; this encourages uneven thawing and bacterial growth. The recommended method involves refrigerating the dough for 4.5 hours, allowing a slow and consistent thaw. Alternatively, you can use the cold-water method, submerging the sealed dough in cold water, changing the water every 30 minutes.
Proper thawing ensures the yeast remains viable and the dough develops the right texture. Rushing the process can lead to poor rise and dense baked goods. Patience during this initial stage sets the foundation for light, fluffy, and flavorful results with Rhodes dough.

Optimal Thawing Temperatures and Times
Rhodes dough thrives with controlled thawing. For refrigerator thawing, maintain a consistent temperature below 40°F (4°C) for approximately 4.5 hours. This slow thaw preserves yeast activity. The cold-water method requires water temperatures between 32°F (0°C) and 40°F (4°C), changing the water every 30 minutes to maintain coolness.
Avoid warm or hot water, as it can kill the yeast. Never thaw on countertops. Optimal temperatures are key to preventing uneven thawing and ensuring a successful rise. Adhering to these guidelines guarantees the dough reaches the ideal consistency for shaping and baking, yielding superior results.
Recognizing Properly Thawed Dough
Properly thawed Rhodes dough exhibits a noticeable pliability. It should be soft, yet hold its shape without being overly sticky or dense. Gently press the dough; it should spring back slowly, indicating sufficient yeast activity. Avoid dough that feels rock-hard or excessively wet.
A slight tackiness is normal, but it shouldn’t cling stubbornly to your hands. If the dough remains icy in the center, it requires further thawing. Correctly thawed dough will stretch without tearing easily, making it ideal for shaping into various forms. This texture ensures a light and airy final product.
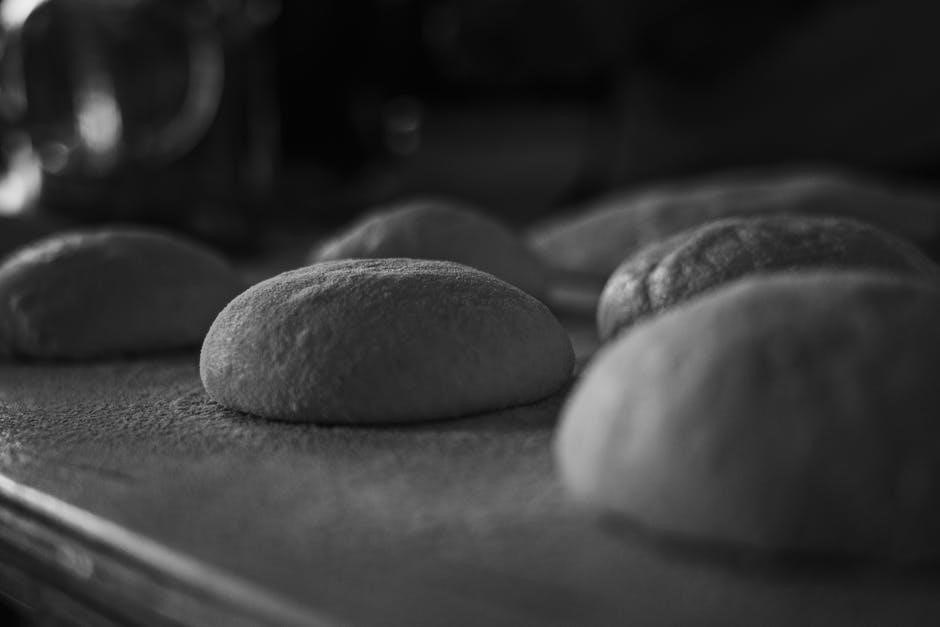
The First Rise: Achieving Maximum Volume
The first rise is crucial for developing flavor and a light, airy texture in Rhodes dough. Place the thawed dough in a lightly greased bowl, turning to coat. Cover loosely with plastic wrap or a clean kitchen towel. A warm, draft-free environment is essential for optimal rising.
Ideal temperatures range between 75-85°F (24-29°C). Locations like a warm kitchen countertop, or atop a refrigerator are suitable. This initial rise allows the yeast to become active, creating the foundation for a beautifully risen baked good. Patience is key for achieving maximum volume.
Ideal Conditions for the First Rise
Achieving the perfect first rise with Rhodes dough hinges on creating a consistently warm and humid environment. Aim for a temperature between 75°F and 85°F (24-29°C) – a slightly warm kitchen is ideal. Avoid drafts, as these can inhibit yeast activity and slow down the rising process.
A sunny window can work, but monitor the temperature to prevent overheating. Lightly greasing the bowl prevents sticking and allows the dough to expand freely. Covering the dough loosely maintains humidity, essential for proper yeast development. Consistent warmth is the key to a successful rise!
How Long Does the First Rise Take? (1-2 Hours)
Typically, the first rise for Rhodes frozen dough takes between one to two hours, but this is heavily influenced by your kitchen’s temperature. Warmer environments will accelerate the process, potentially shortening the rise time, while cooler temperatures will extend it. Don’t rely solely on the clock; observe the dough’s volume.
You’re looking for it to roughly double in size. A longer thaw time, up to 4.5 hours, may necessitate a longer rise. Patience is crucial! Resist the urge to rush the process, as a proper first rise is fundamental to a light and airy final product.
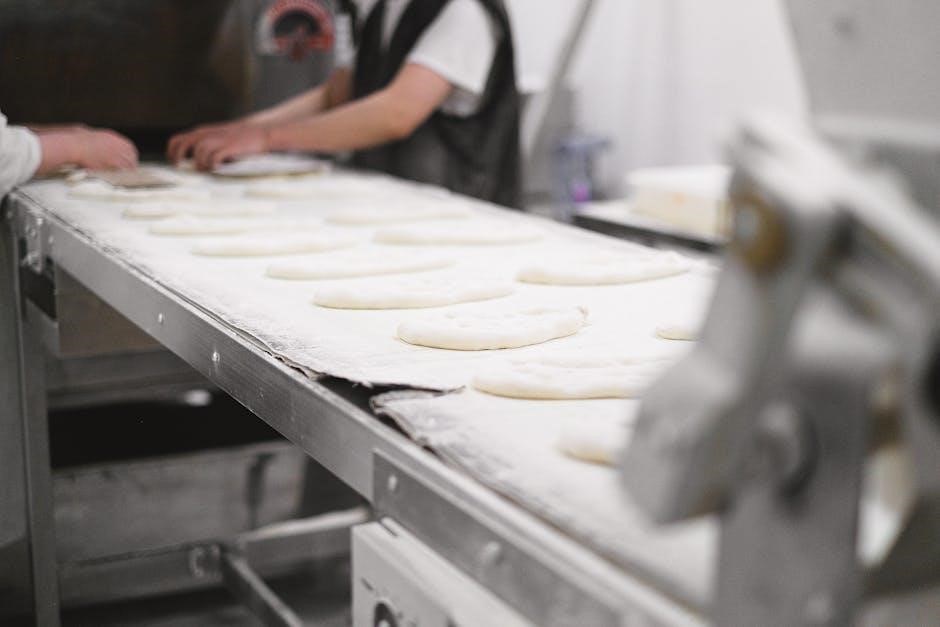
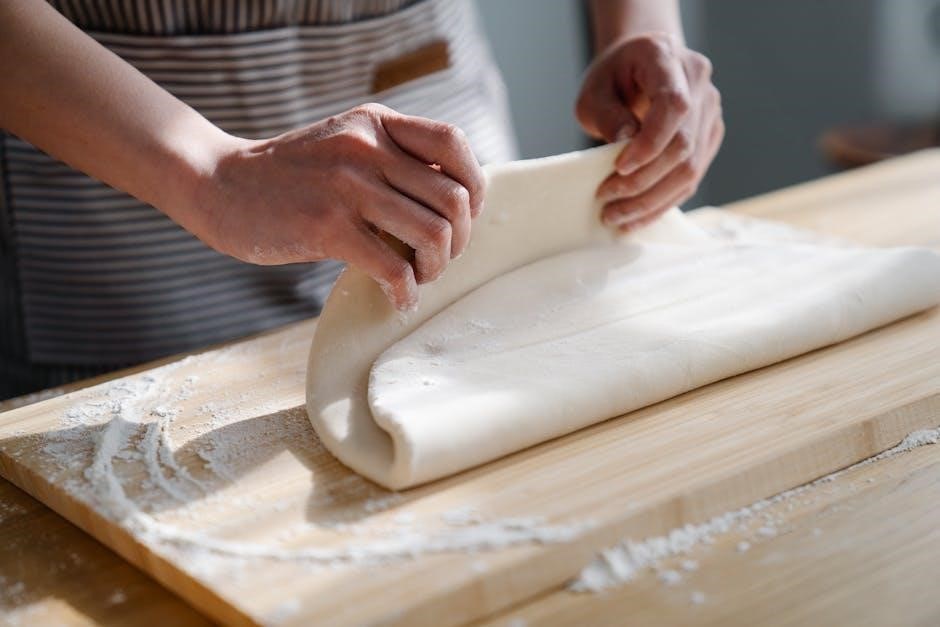
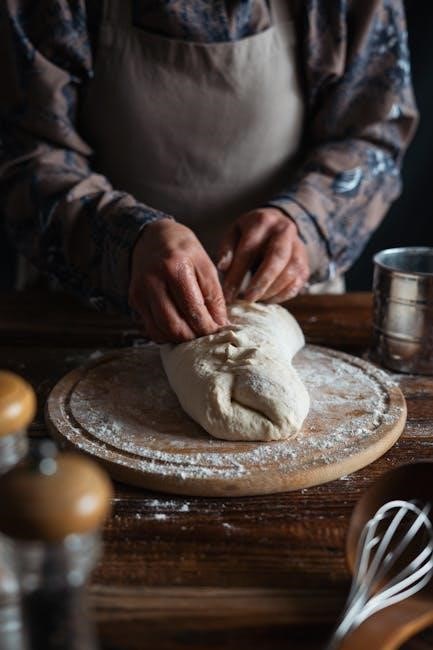
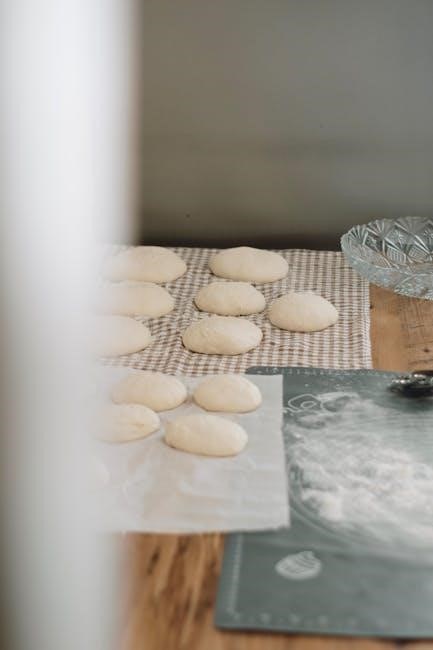
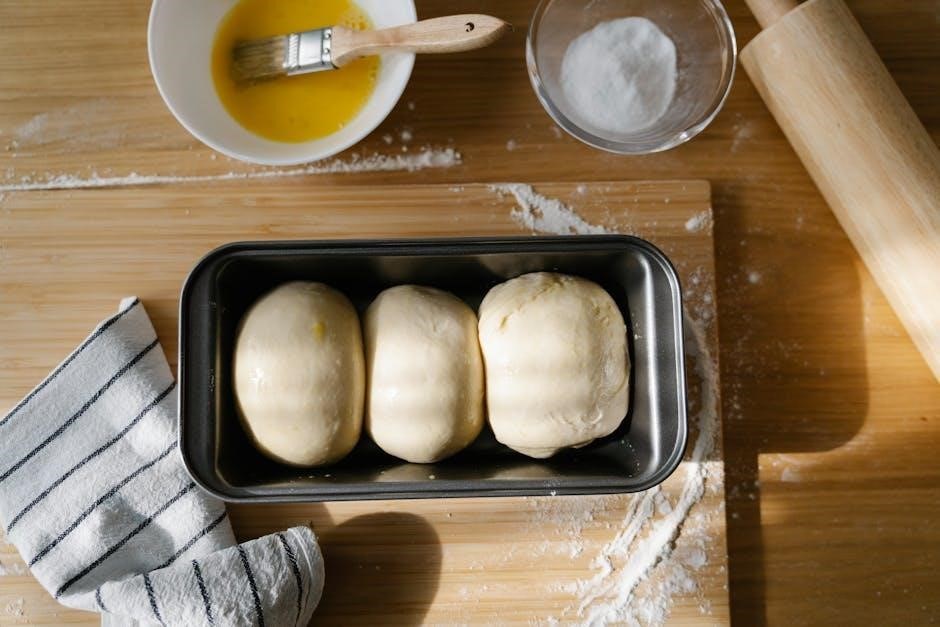
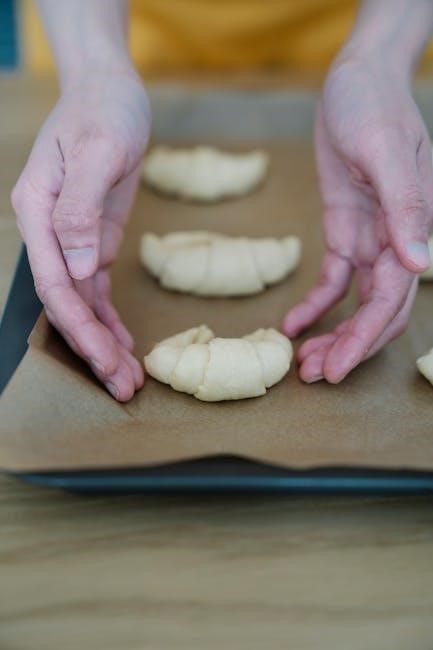
Shaping and Preparing the Dough
Once thawed and after the first rise, Rhodes dough is wonderfully pliable and ready for shaping. Popular choices include classic rolls, braided breads, or even cinnamon knots. Gently work the dough, avoiding excessive flour, which can make the final product dense.
For baking, prepare your sheet by lining it with parchment paper or aluminum foil, then lightly spray with cooking spray. This prevents sticking and ensures easy removal. Arrange the shaped dough evenly on the prepared baking sheet, leaving a little space between each piece to allow for expansion during the second rise.
Popular Shapes: Rolls, Breads, and More
Rhodes frozen dough’s versatility shines through in the array of shapes you can create. Classic dinner rolls are always a hit, while sweet rolls with cinnamon filling offer a delightful treat. For a rustic touch, try forming artisan loaves or French rolls, perfect for dipping in soups or enjoying with butter.
Don’t limit yourself! Experiment with braids, knots, or even individual pastries. The dough readily adapts to various forms. Remember gentle handling is key to maintaining a light and airy texture. Unleash your creativity and enjoy the process of transforming simple dough into beautiful, homemade baked goods!
Preparing the Baking Sheet: Parchment vs. Foil
Proper baking sheet preparation is crucial for preventing sticking and ensuring even baking with Rhodes dough. Both parchment paper and aluminum foil are viable options, but each offers distinct advantages. Parchment provides a naturally non-stick surface, simplifying cleanup and minimizing the risk of tearing the delicate dough.
Foil is a readily available alternative, but requires a light coating of cooking spray to prevent adhesion. Regardless of your choice, always ensure the sheet is adequately covered. This prevents the rolls from fusing together during baking and allows for easy removal once golden brown and fully cooked.
The Second Rise: Before Baking
The second rise is a vital step in achieving light and fluffy Rhodes baked goods. After shaping, allow the dough to rise again, developing further flavor and texture. This rise allows the gluten to relax, resulting in a tender crumb. Ensure a warm, draft-free environment for optimal expansion.
Observe the dough closely; it should noticeably increase in size, becoming puffy and slightly jiggly. This typically takes around 30-60 minutes, but can vary based on room temperature. A properly risen dough will yield a superior final product, offering a delightful eating experience.
Importance of the Second Rise
The second rise isn’t merely a procedural step; it’s fundamental to the texture of your Rhodes creations. This stage allows yeast to produce carbon dioxide, creating air pockets within the dough. These pockets expand during baking, resulting in a light, airy, and wonderfully soft final product. Skipping or shortening this rise leads to dense, heavy rolls or breads.
Properly risen dough exhibits elasticity and a delicate structure. It’s the key to achieving that desirable pull-apart texture in rolls and a pleasing crumb in loaves. Don’t underestimate its impact – a patient second rise translates directly into superior taste and enjoyment!
Second Rise Duration and Indicators

The duration of the second rise with Rhodes dough typically ranges from 30 to 60 minutes, though environmental factors like temperature significantly influence this timeframe. A warm, humid environment accelerates the process, while cooler conditions extend it. The ideal indicator isn’t time, but visual cues.
Look for a noticeable increase in volume – the dough should almost double in size. Gently poke the dough; if the indentation slowly springs back, it’s ready for baking. If it springs back immediately, it needs more time; Avoid over-proofing, as this can cause collapse during baking.
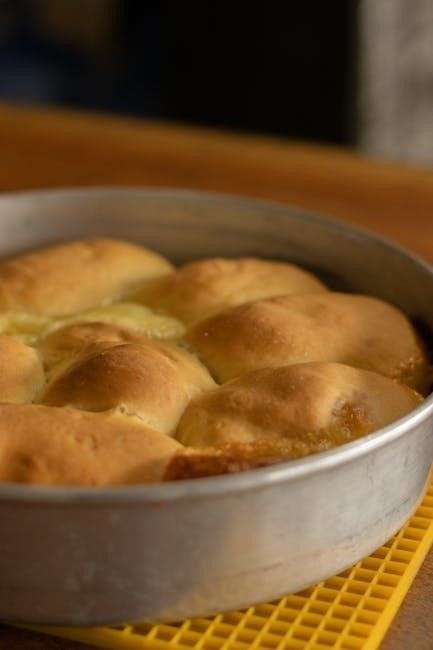
Baking Temperature: Finding the Sweet Spot (350°F)
The universally recommended baking temperature for Rhodes frozen dough is 350°F (175°C). This moderate heat allows the dough to fully cook through without excessively browning the exterior before the interior reaches the desired doneness. Maintaining a consistent 350°F is crucial for even baking and optimal texture.
While slight adjustments can be made based on altitude or specific recipes, starting at 350°F provides a reliable baseline. Consistent temperature ensures a golden-brown crust and a soft, fluffy interior, maximizing the potential of your Rhodes creations.
Baking Time: A Guide Based on Product Type
Baking time varies depending on the Rhodes product you’re using. Sweet rolls and cinnamon knots typically require 25-30 minutes at 350°F, ensuring a fully cooked, gooey center. French rolls and artisan rolls bake faster, usually within 12-14 minutes, achieving a crisp crust.
For general rolls, a baking time of 15-20 minutes is a good starting point. Always monitor closely during the final minutes to prevent over-baking. Visual cues, like golden-brown color, are essential. Remember, these are guidelines; adjust based on your oven and desired level of doneness.
Sweet Rolls & Cinnamon Knots (25-30 minutes)
When baking Rhodes sweet rolls or cinnamon knots, preheat your oven to 350°F. Arrange the rolls on a prepared baking sheet lined with parchment paper or foil. Bake for approximately 25-30 minutes, or until they achieve a beautiful golden-brown color.
Ensure the centers are fully cooked; a toothpick inserted should come out clean. These rolls benefit from a slightly longer bake time to allow the sweet filling to melt and caramelize. Keep a close watch during the last five minutes to prevent burning, and enjoy warm!
French Rolls & Artisan Rolls (12-14 minutes)
For Rhodes French or artisan rolls, preheat your oven to 350°F. Place the desired number of frozen rolls onto a baking sheet prepared with parchment paper or foil. Bake for just 12 to 14 minutes, keeping a watchful eye for a light golden-brown hue.
These rolls bake quickly, so avoid overbaking to maintain a soft, chewy interior. They are perfect for sandwiches or enjoying with soups. Check for doneness by gently pressing; they should spring back slightly. Enjoy these versatile rolls fresh from the oven!
General Roll Baking Time (15-20 minutes)
When baking Rhodes rolls, a typical baking time falls within the 15 to 20-minute range at 350°F. Ensure your oven is properly preheated for even cooking. Arrange the frozen rolls on a prepared baking sheet, lined with parchment or foil, and lightly sprayed with cooking spray.
Monitor the rolls closely, especially towards the end of the baking period, to prevent over-browning. A golden-brown color indicates readiness. Remember, baking times can vary slightly based on roll size and oven calibration. Enjoy these freshly baked, versatile rolls!
Checking for Doneness: Visual Cues
Determining when Rhodes baked goods are perfectly done relies on observing key visual indicators. The most prominent cue is a rich, golden-brown color across the surface of the rolls or bread. This signifies the Maillard reaction, indicating proper baking and flavor development.
However, color alone isn’t enough. Consider checking the internal temperature; while not always necessary for rolls, it ensures thorough cooking. A fully baked roll will feel light and sound hollow when tapped. Trust your senses and enjoy the delightful aroma of freshly baked Rhodes!
Golden Brown Color
Achieving a beautiful golden-brown color is a primary visual indicator of perfectly baked Rhodes frozen dough products. This hue develops through the Maillard reaction, a chemical process between amino acids and reducing sugars, creating complex flavors and aromas.
The intensity of the golden-brown shade signifies sufficient baking time and heat exposure. However, ovens vary, so monitor closely! Avoid excessively dark coloration, which indicates potential burning. A uniform golden-brown surface suggests even baking, promising a delightful texture and taste in every bite of your Rhodes creation.
Internal Temperature Considerations
While visual cues like golden-brown color are helpful, verifying the internal temperature ensures Rhodes baked goods are fully cooked. For rolls and sweet treats, aim for an internal temperature of 190-200°F (88-93°C). Use an instant-read thermometer inserted into the center of a roll to obtain an accurate reading.
This temperature range guarantees the yeast is fully activated, and the dough is cooked through, preventing a gummy or underbaked texture. Remember, carryover cooking continues after removing from the oven, so slightly under-baking is preferable to over-baking.
Troubleshooting Common Baking Issues
Encountering problems with Rhodes dough? Insufficient rise often stems from inadequate thawing – a 4.5-hour thaw may be necessary. Ensure a warm environment during both rises. If rolls are too hard or dense, reduce baking time; 40 minutes at 350°F is excessive. Consider a slightly lower temperature or shorter duration.
Butter temperature significantly impacts texture; experiment to find what works best for your kitchen. Remember altitude adjustments are crucial for optimal results. Consistent monitoring and small adjustments will lead to perfectly baked Rhodes creations!
Rolls Didn’t Rise Enough (4.5 hour thaw time)
Even with a 4.5-hour thaw, insufficient rising can occur. Ensure the dough is in a consistently warm location, free from drafts. The ideal temperature range is crucial for yeast activity. Consider placing the dough on top of the refrigerator or near a warm (but not hot) window.
Humidity also plays a role; drier environments may require a longer rise. Gently check the dough – it should nearly double in size. If it remains stubbornly flat, allow for an additional 30-60 minutes of rising time before baking. Patience is key!
Rolls are Too Hard/Dense (40 minute bake time at 350F)
If your Rhodes rolls are hard or dense despite a 40-minute bake at 350°F, several factors could be at play. Overbaking is a primary culprit; reduce baking time slightly in future attempts. Ensure proper thawing and rising, as these stages are vital for a light texture.
Butter temperature significantly impacts the final result – using butter that’s too cold can contribute to density. A slightly shorter bake time, combined with careful monitoring, should yield softer, more tender rolls. Consider reducing the temperature by 25°F for the next batch.
Adjusting Baking Time for Altitude
Baking with Rhodes frozen dough at higher altitudes requires adjustments to baking time and potentially temperature. Reduced air pressure causes liquids to evaporate faster, potentially leading to drier, denser baked goods. Generally, decrease baking temperature by 25°F and increase baking time by 3-5 minutes.
Monitor rolls closely, as altitude adjustments are not precise and vary based on elevation. Begin checking for doneness a few minutes before the recommended time. Proper hydration of the dough during the rising stages is also crucial at higher altitudes to combat dryness.
Butter Temperature and its Impact on Baking
Butter temperature significantly impacts the texture of baked goods made with Rhodes frozen dough. Softer, but not melted, butter incorporates air more easily, creating lighter, fluffier rolls. Conversely, cold butter results in denser, chewier textures. Many bakers note that butter temperature can “completely change everything” in baking.
When making fillings or toppings, ensure butter is pliable enough to spread evenly without tearing the dough. Experimenting with butter temperature allows you to fine-tune the final product’s texture to your preference, achieving optimal results with Rhodes dough.
Storing Leftover Rhodes Baked Goods
Proper storage is key to maintaining the freshness of leftover Rhodes baked goods. At room temperature, store rolls or breads in an airtight container or resealable plastic bag for up to two days. For longer preservation, freezing is recommended.
To freeze, allow the baked goods to cool completely, then wrap tightly in plastic wrap followed by aluminum foil, or place in a freezer-safe bag. Frozen baked goods can retain quality for up to two months. Reheat gently in the oven or microwave to restore some of their original texture and flavor.
Freezing Baked Rhodes Rolls
Extending the life of your delicious Rhodes rolls is easily achieved through proper freezing techniques. Allow the fully baked rolls to cool completely on a wire rack before beginning. Wrap each roll individually in plastic wrap, ensuring a tight seal to prevent freezer burn.
Subsequently, place the wrapped rolls into a freezer-safe bag or airtight container. Properly frozen rolls can maintain good quality for up to two months. When ready to enjoy, thaw at room temperature or reheat directly from frozen in a preheated oven for best results.
Recipe Ideas Using Rhodes Frozen Dough
Rhodes frozen dough is incredibly versatile, opening doors to a world of baking possibilities! Beyond classic rolls and breads, explore sweet cinnamon knots, requiring a 25-30 minute bake at 350°F. Create delightful French rolls or artisan loaves, baked for 12-14 minutes.
Experiment with savory fillings like cheese and herbs, or sweeten things up with fruit preserves. Utilize the dough for pizza crusts, breakfast pastries, or even individual pot pies. The possibilities are truly endless, limited only by your imagination and culinary creativity. Enjoy!
Where to Purchase Rhodes Frozen Dough
Rhodes frozen dough is widely available across the United States, ensuring convenient access for bakers nationwide. Major grocery chains like Publix Super Markets consistently stock a variety of Rhodes products, including their Bake-N-Serv line.
You can also find Rhodes dough at Walmart, Kroger, and other regional supermarkets. Check the frozen bread dough section for their signature rolls, loaves, and sweet treats. Online retailers may also carry Rhodes, offering delivery options for added convenience. Availability can vary by location, so checking store websites is recommended.
Rhodes Dough Nutritional Information
Rhodes frozen dough, while a convenient baking solution, contains typical bread dough nutritional components. A single roll generally provides around 120-150 calories, with 2-3 grams of fat and 20-25 grams of carbohydrates. Protein content usually falls between 4-5 grams per roll.
It’s important to note that these values can vary slightly depending on the specific product type (e.g., sweet rolls vs. French rolls). Rhodes dough contains wheat flour, sugar, and yeast, so individuals with gluten sensitivities or diabetes should be mindful of portion sizes. Always refer to the packaging for the most accurate nutritional details.
Comparing Rhodes Dough to Other Frozen Dough Brands
Rhodes frozen dough distinguishes itself through its unique texture and consistent rise, often favored for its versatility. Compared to brands like Bridgford, Rhodes generally requires a longer thaw time – up to 4.5 hours – but yields a softer, more bread-like result. Other brands may offer quicker thaw options but sometimes lack the same depth of flavor.
Pillsbury frozen dough, while widely available, often contains more additives and a slightly sweeter taste. Rhodes focuses on a simpler ingredient list, appealing to bakers seeking a more traditional bread experience. Ultimately, the best brand depends on individual preferences and desired baking outcomes.